
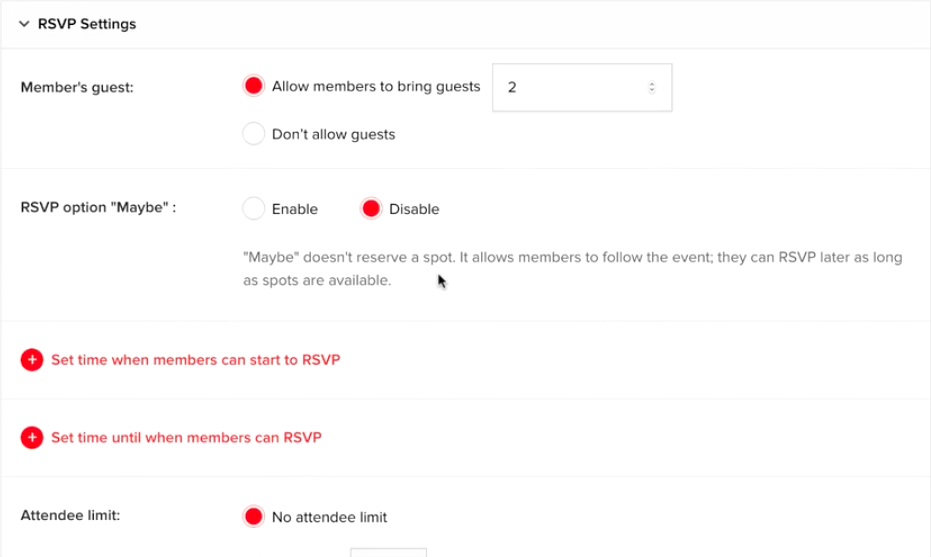
When setting up your event, you are able to set many options for your guests when they accept your invitation. Go to your Event, choose Edit and scroll to the RSVP settings area.
Allowing Members to Bring Guests
If you want to get more potential guests to your event, you can allow your invitees to bring guests. Set a limit on how many guests they can bring, leave it open, or don’t allow guests at all.
When your guests RSVP, they will tell you how many extra guests they are bringing and will show up on your RSVP list as e.g. MemberName+1, and that extra 1 person would be counted to the event limit (if you have set one). Extra guests do not receive the invitation or need to RSVP themselves.
Adding the ‘Maybe’ Option
If you want to give your members a third RSVP option, you can add the ‘Maybe’ option. By default, this is disabled, but you can enable it at any time in the RSVP settings.

When enabled, members who have chosen to RSVP as ‘Maybe’ will receive all the same communication as the members who responded ‘Yes’, but they are not counted on the attendees list and they will not be considered for a wait list if this option is enabled.
As an Organizer you have the option to exclude users who responded ‘Maybe’ to your event.
When the member goes to RSVP an event, they will see the ‘Maybe’ option in the dropdown.
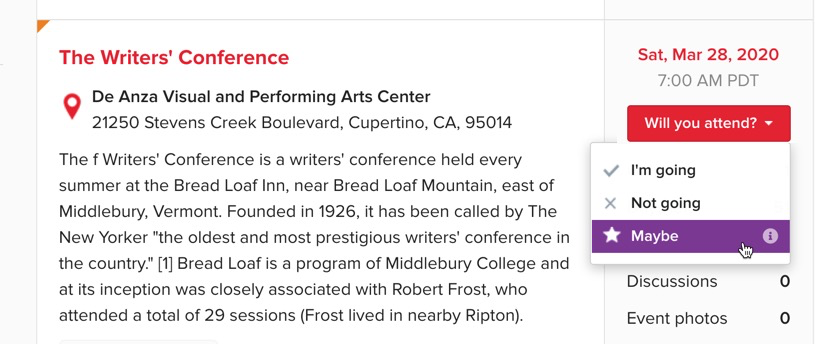
The ‘Maybe’ option is useful for members who haven’t decided yet if they are going to attend, but who would like to be kept updated about an event.
However, if you want your invitees to commit one way or the other so that you can plan your event, it’s better to exclude this option.
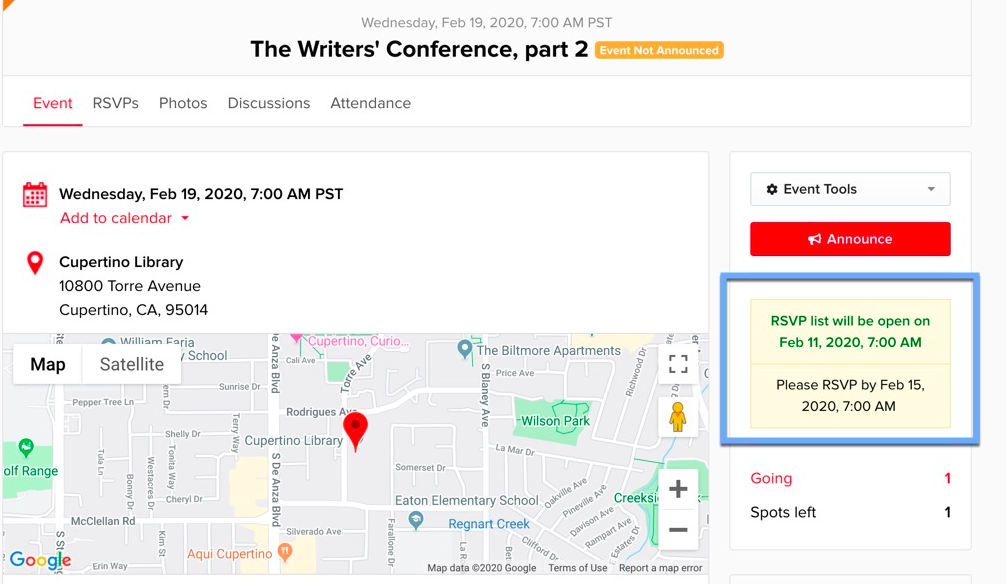
Allowing RSVP Start and End Dates
You can also set dates when you would like to enable RSVP to start and end. For example, if you need to book a restaurant, you may need to set a deadline for RSVPs so that you know the exact number of guests well ahead of time. Or, if the event is a long way off, you may not want to allow guests to RSVP straight away, in case they forget or their plans change.
Attendees will see the start or end time for RSVPs on the right of the Event page.
Limit the Number of Guests at Your Event
You can also limit the total number of guests at your event.

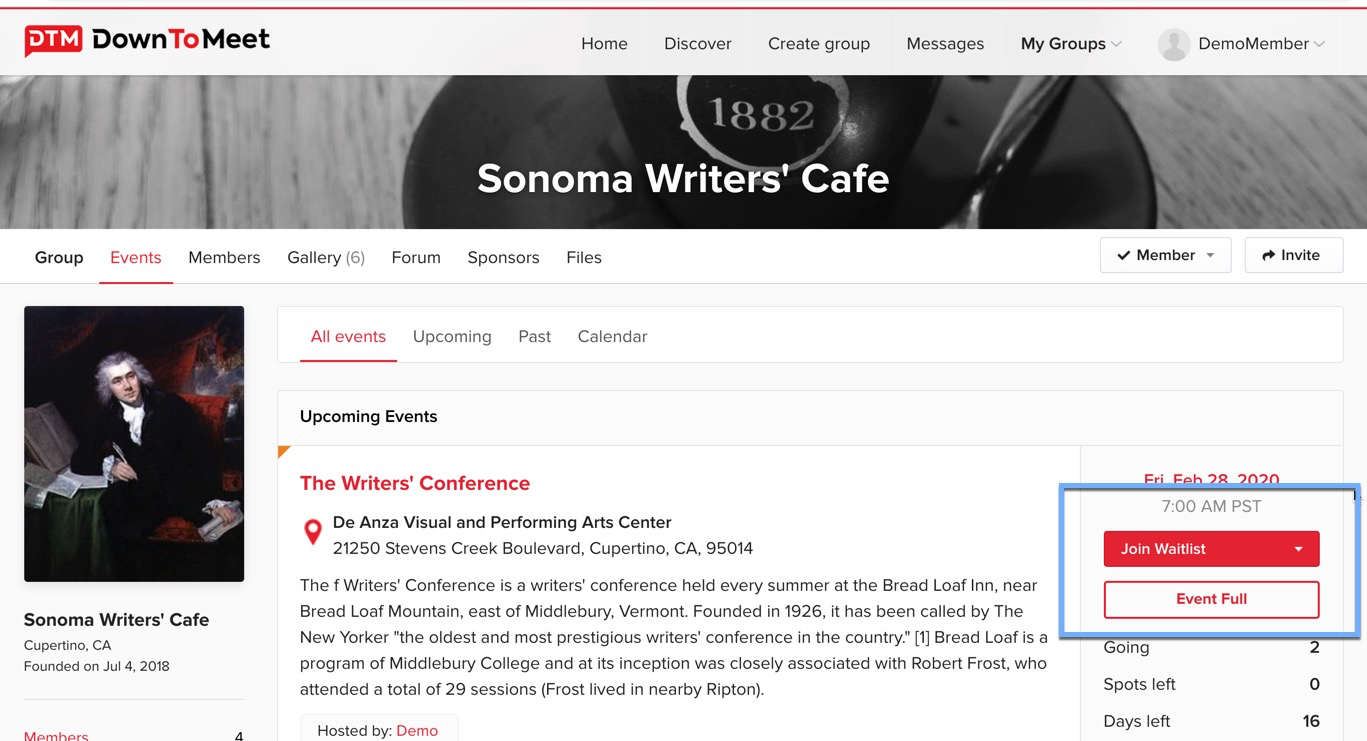
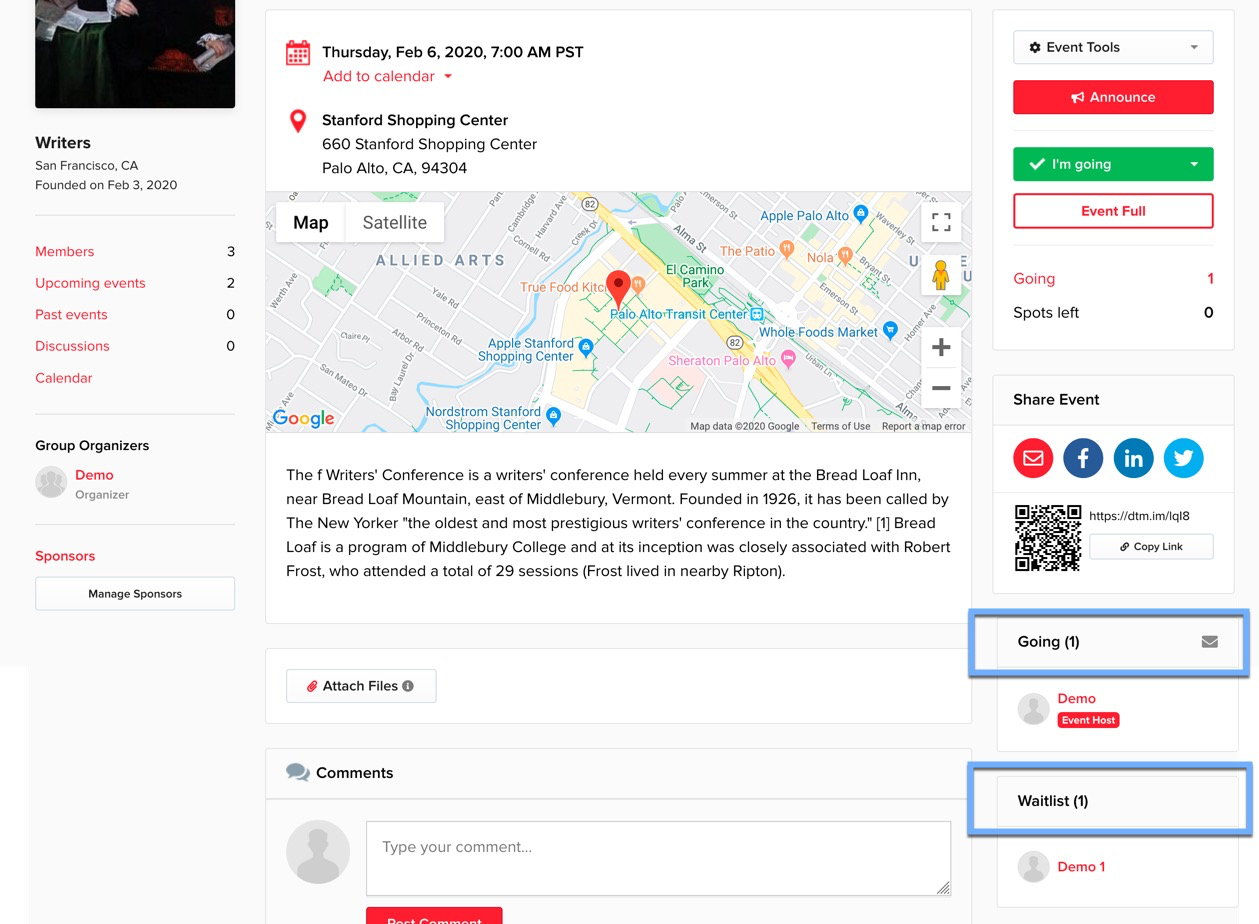
Once the limit is reached (the specified number of invitees have RSVPd ‘Yes’), the Event Full message will appear on the Event.
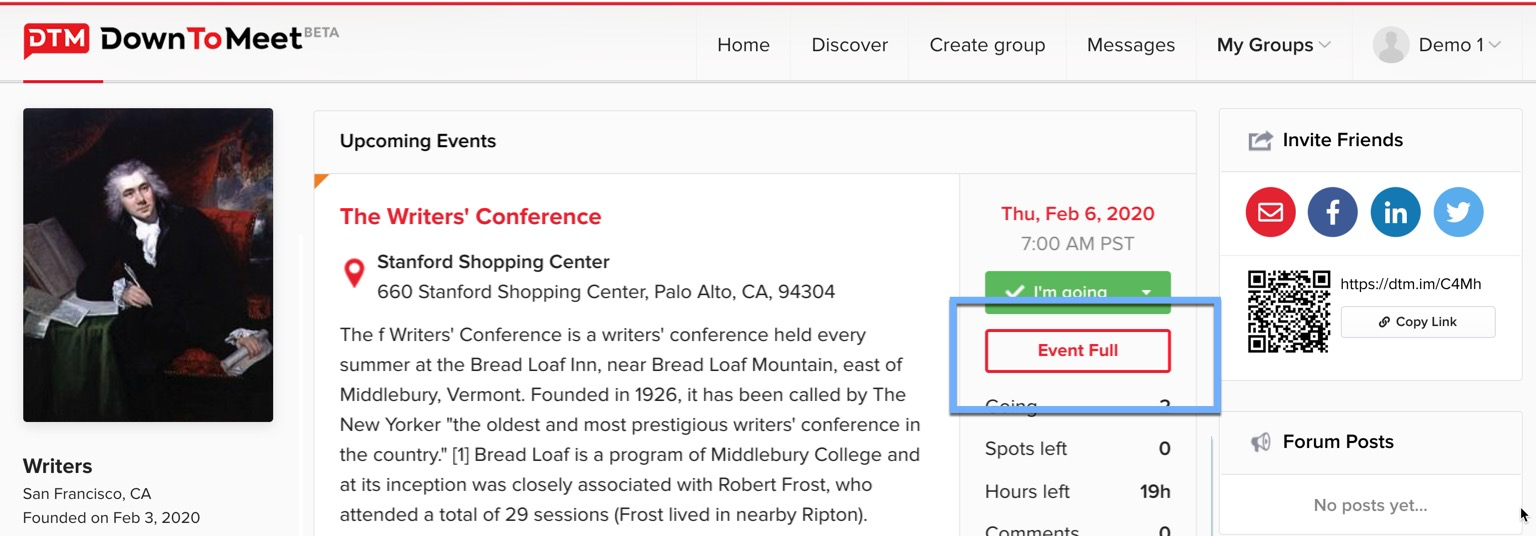
By default, no more people will be able to join the event at this point. However, you can enable a waitlist to give people who are late to RSVP the opportunity to attend in the case that someone else drops out.
Alongside the Event Full message, they will see Join Waitlist.
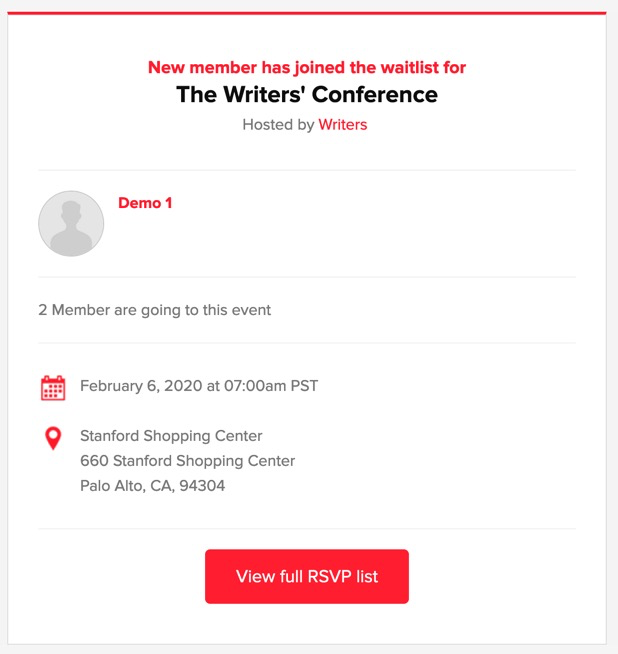
On joining the waitlist, the user will receive a message with some details about the event.
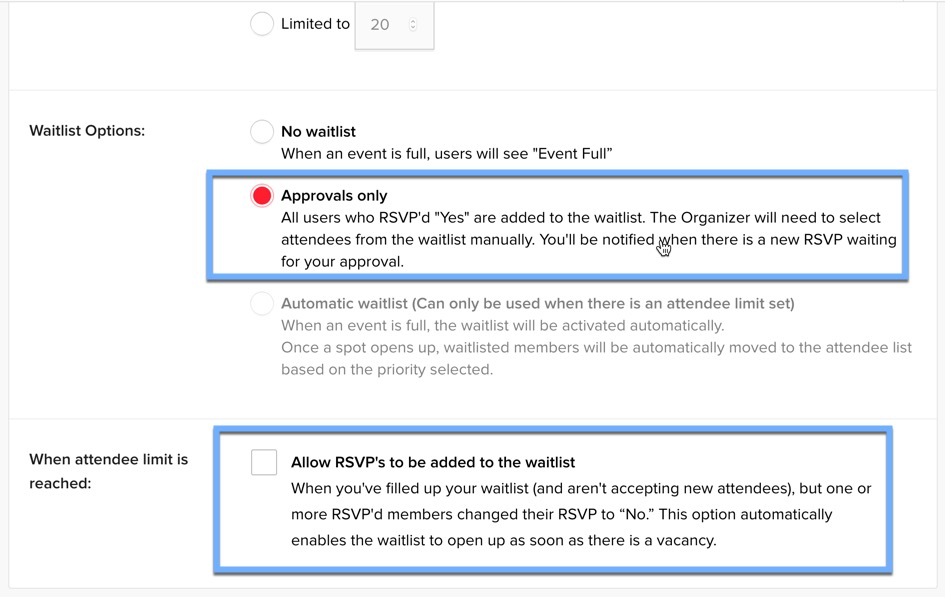
Enable the Waitlist in Settings and choose from some different options.
Setting Waitlist Options
Waitlists can function to help you maintain a little more control over your event.
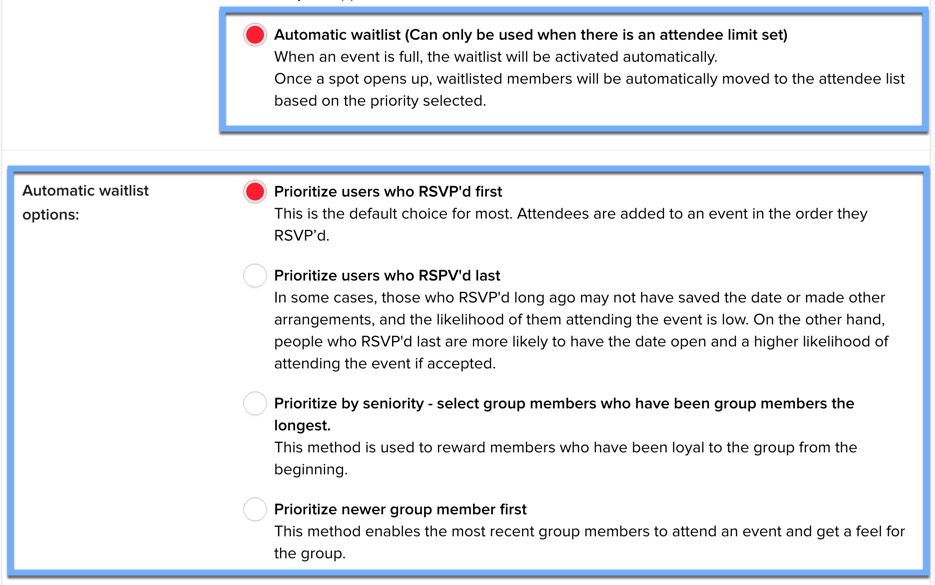
Automatic Waitlist
Use this option if you have set a maximum number of event attendees for your event, but would like the option to add late attendees to a list. This list then automatically fills spaces in your event if people drop out.
When you select the automatic waitlist, you can ask the system to prioritize certain users based on seniority in the group or on who RSVP’d first.
Select the option that makes most sense for your event in Automatic Waitlist Options
Approvals Only
Select Approvals Only if you don’t have a limit on how many people can attend the event but you do want to be able to manually manage which users are coming.
With this option activated, all users who RSVP ‘Yes’ will go onto a waitlist. You will be notified and will be able to view the member and approve them for the event. This can be useful for sports events, where you want to make sure all members fit with the ability level of the group.
When you select this option, you will get the additional option Allow RSVPs to be added to the Waitlist which automatically tops up your waitlist when somebody drops out.
On the event page, the Organizer will see how many attendees are going and how many are on the waitlist.
In the RSVP area of the Event, the Organizer can change the status of people on the waitlist. Select Waitlist to see who is on the waitlist, then change the status to Going and they will be added to the list of attendees.
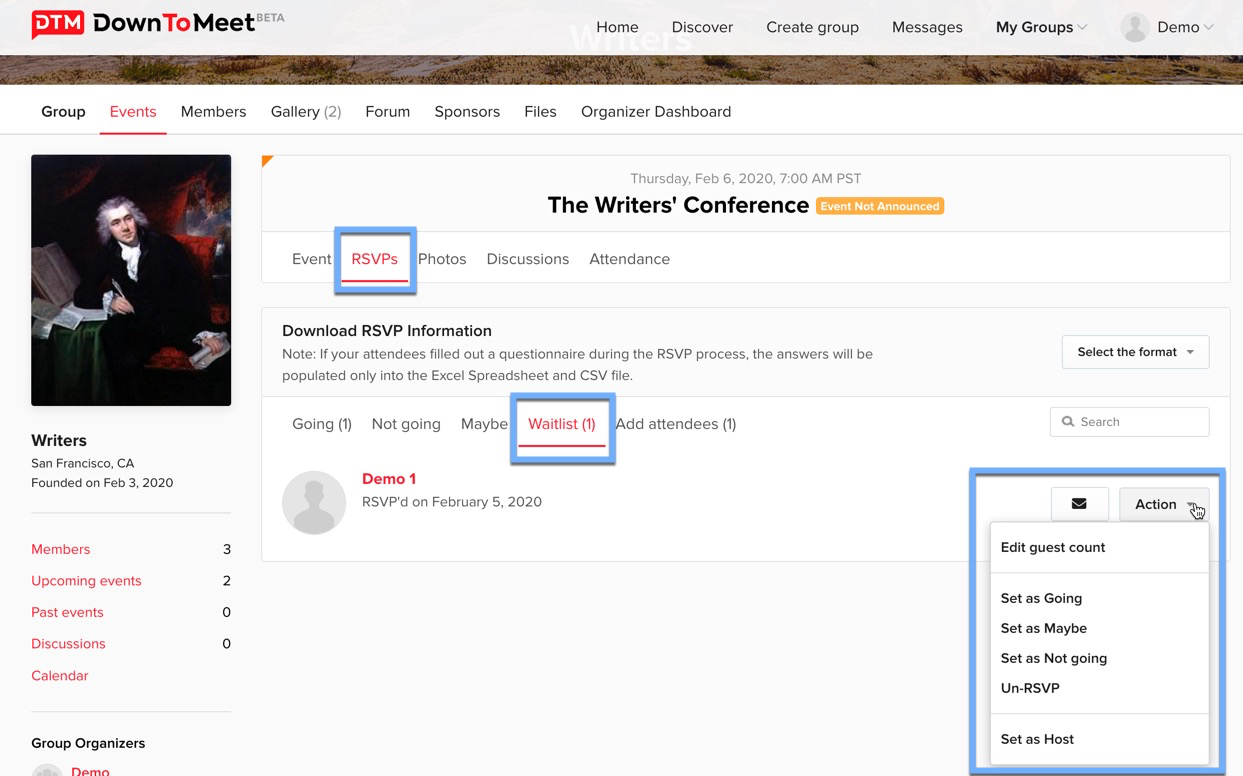
In the same way, if a user on the list of attendees changes their status to Not Going, a space becomes available that can be filled by somebody on the Waitlist.